
前言
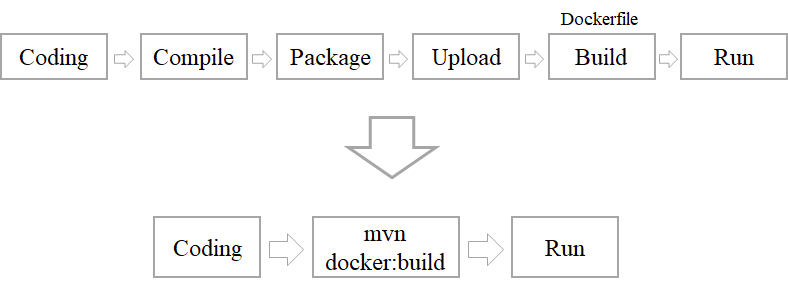
通常我们使用docker 都是在服务器端pull镜像然后根据镜像创建容器。对于自开发的应用,如果想要将其创建为docker镜像一般需要将应用编译打包后编写Dockerfile文件使用docker build命令构建成docker镜像。对于每次的版本升级和功能迭代都需要重复这些步骤,因此最好将这些操作流程化和自动化。
可以对docker进行相关配置,客户端可远程对docker服务进行操作。
If you need to access the Docker daemon remotely, you need to enable the
tcpSocket. Beware that the default setup provides un-encrypted and un-authenticated direct access to the Docker daemon - and should be secured either using the built in HTTPS encrypted socket, or by putting a secure web proxy in front of it. You can listen on port2375on all network interfaces with-H tcp://0.0.0.0:2375, or on a particular network interface using its IP address:-H tcp://192.168.59.103:2375. It is conventional to use port2375for un-encrypted, and port2376for encrypted communication with the daemon.
最简单的方式就是将docker向外暴露。
# vim /usr/lib/systemd/system/docker.service
...第13行
ExecStart=/usr/bin/dockerd -H fd:// \
    -H tcp://0.0.0.0:2375 \
    --containerd=/run/containerd/containerd.sock
...
# service docker restart
但是,这样的方式没有任何防护,是非常不安全的,因为docker默认是以root用户启动的,一旦黑客通过docker服务对服务器进行攻击,很容易拿到服务器的root权限从而造成严重的后果。因此最好对docker服务进行加密,只有拿到加密证书的客户端才能对服务端进行操作。
具体步骤
- 创建加密证书
- 配置docker服务使用加密方式
- 客户端连接时指定证书
官方文档:
- https://docs.docker.com/engine/reference/commandline/dockerd/#:~:text=Examples-,Daemon socket option,-🔗
- https://docs.docker.com/engine/security/protect-access/#:~:text=C ControlPersist yes-,Use TLS (HTTPS) to protect the Docker daemon socket,-🔗
生成证书
$ HOST=example.com
$ openssl genrsa -aes256 -out ca-key.pem 4096
Generating RSA private key, 4096 bit long modulus (2 primes)
..........++++
.........................................................................................................................................................................................++++
e is 65537 (0x010001)
Enter pass phrase for ca-key.pem:
Verifying - Enter pass phrase for ca-key.pem:
$ openssl req -new -x509 -days 365 -key ca-key.pem -sha256 -out ca.pem
Enter pass phrase for ca-key.pem:
You are about to be asked to enter information that will be incorporated
into your certificate request.
What you are about to enter is what is called a Distinguished Name or a DN.
There are quite a few fields but you can leave some blank
For some fields there will be a default value,
If you enter '.', the field will be left blank.
-----
Country Name (2 letter code) [AU]:CN
State or Province Name (full name) [Some-State]:Beijing
Locality Name (eg, city) []:Chaoyang
Organization Name (eg, company) [Internet Widgits Pty Ltd]:ZNH
Organizational Unit Name (eg, section) []:
Common Name (e.g. server FQDN or YOUR name) []:
Email Address []:alayama@163.com
$ openssl genrsa -out server-key.pem 4096
Generating RSA private key, 4096 bit long modulus (2 primes)
........................................................................................................................................................++++
...............................................++++
e is 65537 (0x010001)
$ openssl req -subj "/CN=$HOST" -sha256 -new -key server-key.pem -out server.csr
$ echo subjectAltName = DNS:$HOST,IP:127.0.0.1 >> extfile.cnf
$ echo extendedKeyUsage = serverAuth >> extfile.cnf
$ openssl x509 -req -days 365 -sha256 -in server.csr -CA ca.pem -CAkey ca-key.pem -CAcreateserial -out server-cert.pem -extfile extfile.cnf
Signature ok
subject=CN = example.com
Getting CA Private Key
Enter pass phrase for ca-key.pem:
$ openssl genrsa -out key.pem 4096
Generating RSA private key, 4096 bit long modulus (2 primes)
.........................................................................................................................................................................................++++
................++++
e is 65537 (0x010001)
$ openssl req -subj '/CN=client' -new -key key.pem -out client.csr
$ echo extendedKeyUsage = clientAuth > extfile-client.cnf
$ openssl x509 -req -days 365 -sha256 -in client.csr -CA ca.pem -CAkey ca-key.pem -CAcreateserial -out cert.pem -extfile extfile-client.cnf
Signature ok
subject=CN = client
Getting CA Private Key
Enter pass phrase for ca-key.pem:
$ rm -v client.csr server.csr extfile.cnf extfile-client.cnf
rm: remove regular file ‘client.csr’? y
removed ‘client.csr’
rm: remove regular file ‘server.csr’? y
removed ‘server.csr’
rm: remove regular file ‘extfile.cnf’? y
removed ‘extfile.cnf’
rm: remove regular file ‘extfile-client.cnf’? y
removed ‘extfile-client.cnf’
$ chmod -v 0400 ca-key.pem key.pem server-key.pem
mode of ‘ca-key.pem’ changed from 0600 (rw-------) to 0400 (r--------)
mode of ‘key.pem’ changed from 0600 (rw-------) to 0400 (r--------)
mode of ‘server-key.pem’ changed from 0600 (rw-------) to 0400 (r--------)
$ chmod -v 0444 ca.pem server-cert.pem cert.pem
mode of ‘ca.pem’ changed from 0644 (rw-r--r--) to 0444 (r--r--r--)
mode of ‘server-cert.pem’ changed from 0644 (rw-r--r--) to 0444 (r--r--r--)
mode of ‘cert.pem’ changed from 0644 (rw-r--r--) to 0444 (r--r--r--)
配置docker使用加密方式
$ vim /usr/lib/systemd/system/docker.service
...第左右13行
ExecStart=/usr/bin/dockerd -H fd:// \
	--tlsverify --tlscacert=/data/docker_cert/ca.pem \
	--tlscert=/data/docker_cert/server-cert.pem \
	--tlskey=/data/docker_cert/server-key.pem \
	-H tcp://0.0.0.0:2376 \
	--containerd=/run/containerd/containerd.sock
...
$ service docker restart
按照官方说法,docker默认使用2375端口作为非加密方式的访问端口,2376端口作为加密端口,且不支持自定义修改。
对于云服务器,需要放开相关的端口外部才可以访问。
对于公司内网环境,直接使用默认端口就好,但是对于外网环境建议再对2376端口进行转发避免黑客对指定端口进行攻击。
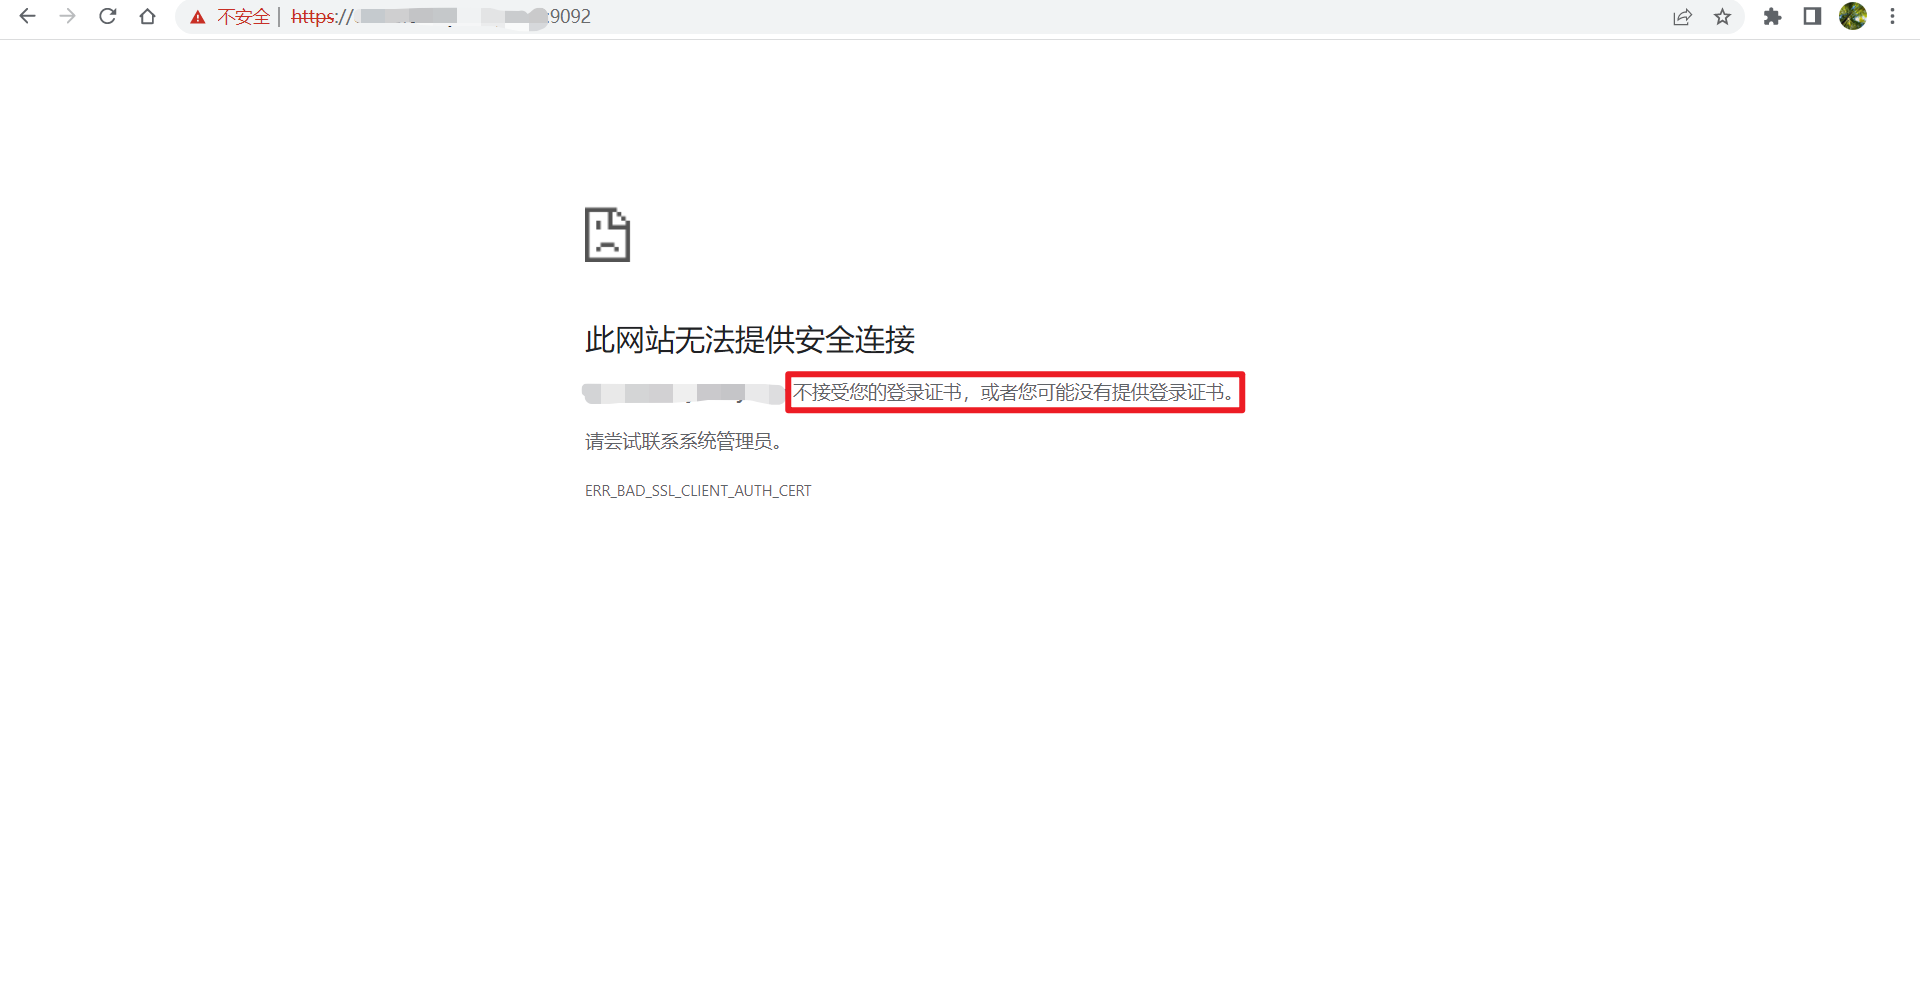
可以在浏览器使用https://$HOST:PORT进行测试,如果提示证书不正确说明配置成功,只有拿到证书的客户端才可以访问远程docker服务。
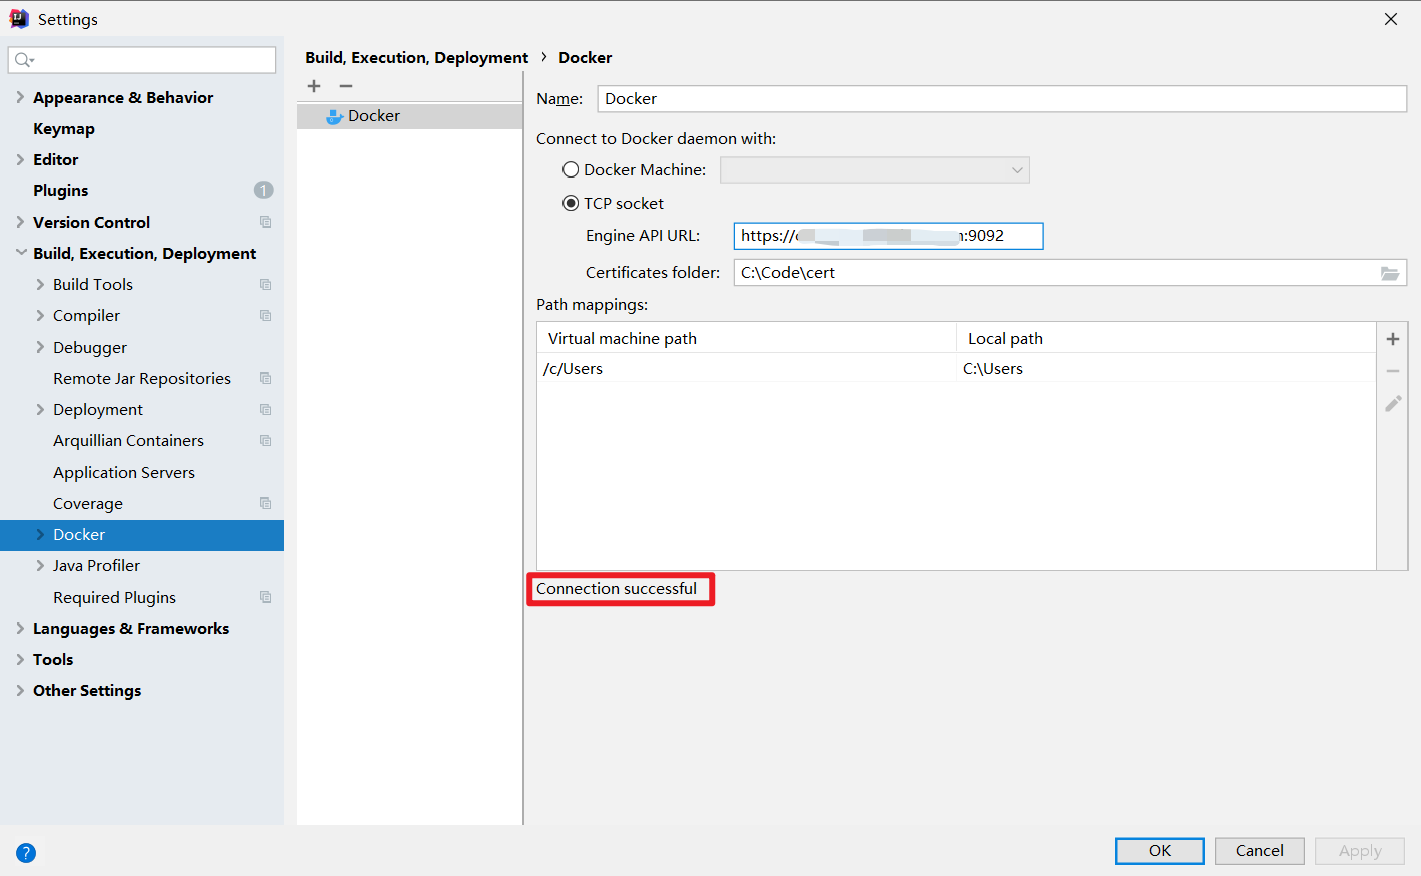
IDEA连接远程Docker
将ca.pem,cert.pem,key.pem三个证书下载到本地。
在IDEA中打开File->Settings->Docker,填写URL和证书目录,
配置maven docker插件
<plugin>
	<groupId>io.fabric8</groupId>
    <artifactId>docker-maven-plugin</artifactId>
</plugin>
这个插件功能很丰富,可定制化程度更高,具体配置如下:
<plugin>
    <groupId>io.fabric8</groupId>
    <artifactId>docker-maven-plugin</artifactId>
    <version>0.39.1</version>
    <configuration>
        <certPath>C:\Code\cert</certPath>
        <dockerHost>https://xxxxxxxxxx:9092</dockerHost>
        <useColor>true</useColor>
        <images>
            <image>
                <alias>${project.name}</alias>
                <name>lymboy/${project.name}</name>
                <build>
                    <from>ccr.ccs.tencentyun.com/lymboy/java8:1.0</from>
                    <maintainer>alayama@163.com</maintainer>
                    <tags>
                        <tag>${project.version}</tag>
                    </tags>
                    <workdir>/opt/</workdir>
                    <ports>
                        <port>8080</port>
                    </ports>
                    <entryPoint>
                        <exec>
                            <arg>java</arg>
                            <arg>-jar</arg>
                            <arg>/opt/${project.name}.jar</arg>
                        </exec>
                    </entryPoint>
                    <assembly>
                        <mode>dir</mode>
                        <targetDir>/opt</targetDir>
                        <descriptorRef>artifact</descriptorRef>
                    </assembly>
                </build>
            </image>
        </images>
    </configuration>
    <dependencies>
        <dependency>
            <groupId>commons-codec</groupId>
            <artifactId>commons-codec</artifactId>
            <version>1.15</version>
        </dependency>
    </dependencies>
</plugin>
添加上述maven插件后,通过maven命令就可以直接将项目构建成docker镜像并推送到远程docker服务。
mvn clean package -Dfile.encoding=UTF-8 docker:build
上述的插件配置等价于如下Dockerfile
FROM ccr.ccs.tencentyun.com/lymboy/java8:1.0
MAINTAINER alayama@163.com
EXPOSE 8080
COPY maven /opt/
WORKDIR /opt/
ENTRYPOINT ["java","-jar","/opt/example.jar"]
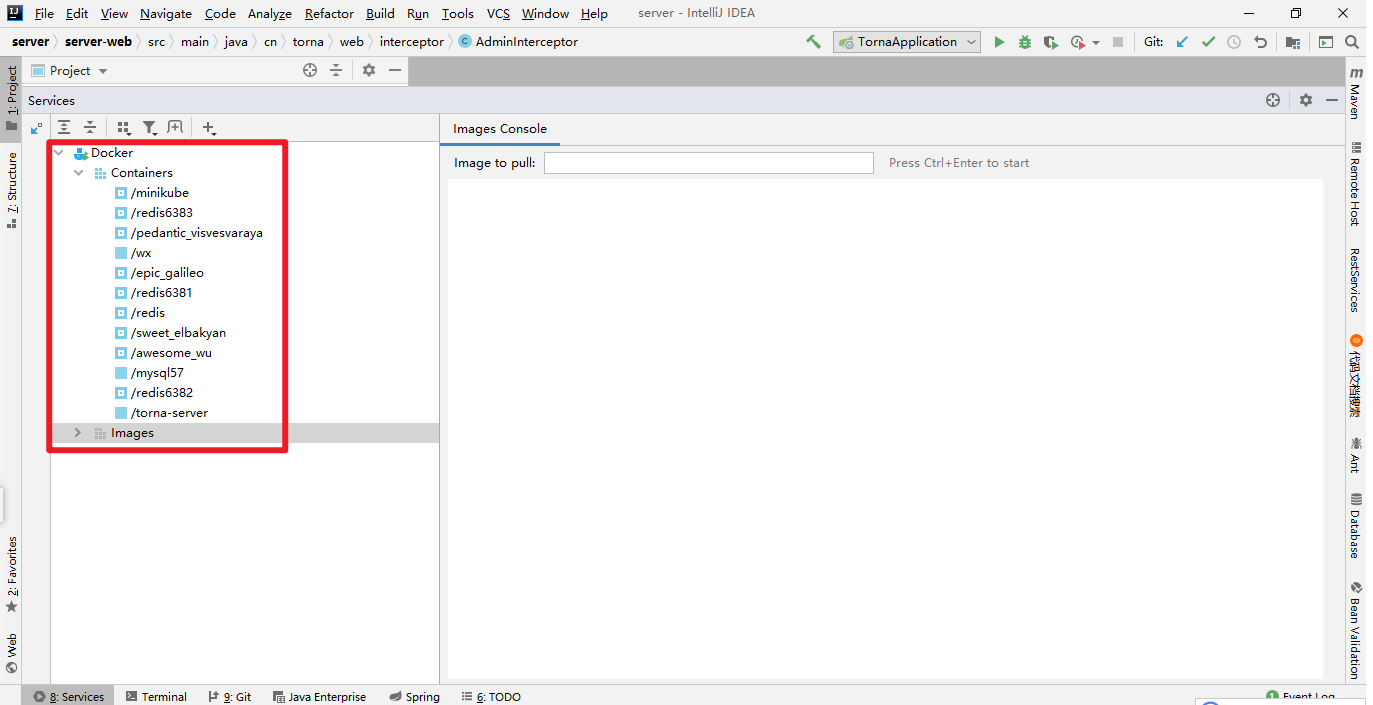
当应用镜像推送到远程docker服务后,可以在IDEA Services直接运行指定的镜像。
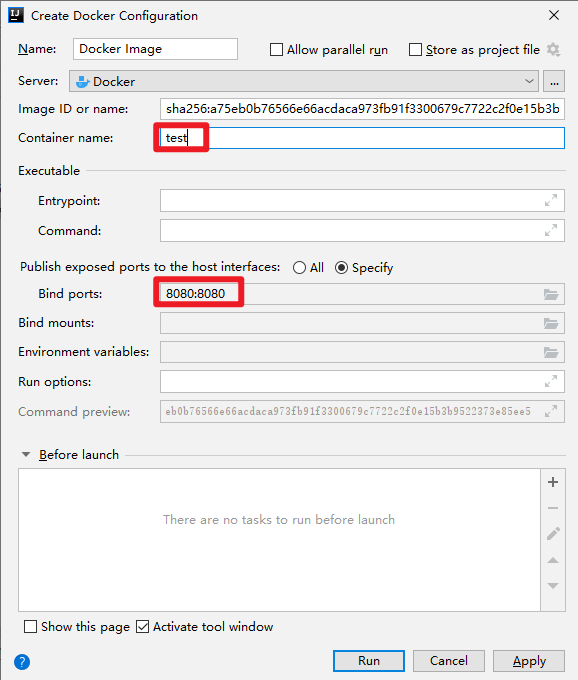
这样,将原本为复杂的应用部署过程直接使用鼠标点击几下就可以解决,非常方便。
如果在构建镜像中有用到jdk8,可以使用笔者构建的jdk8基础镜像ccr.ccs.tencentyun.com/lymboy/java8:1.0